
5 Beginner Detailing Mistakes and How to Avoid Them
Car detailing looks simple until you try to do it properly. A clean bucket, a bottle of shampoo and a polishing machine might look like enough from the outside, but technique matters at every stage.
Small mistakes can leave swirl marks, dull paint, stained trim or uneven polishing marks. Some errors only show up under strong lighting, which is why beginners often do not realise something has gone wrong until the car is back in the sun.
The good news is that most beginner errors are avoidable. With the right process, the right products and proper hands-on practice, detailing becomes much more controlled. You stop guessing and start understanding why each step matters.
Here are five beginner detailing mistakes, plus how to avoid them before they become expensive habits.
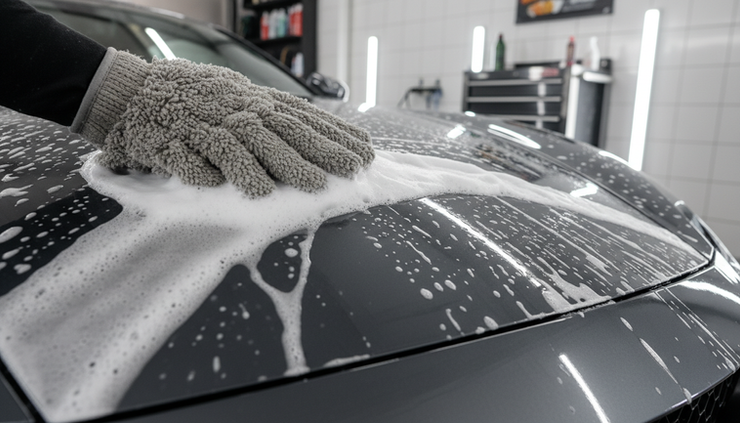
1. Using the wrong wash technique
Washing is where many paint defects begin. That sounds strange because washing should be the safest, simplest part of the job. In reality, poor wash technique is one of the main reasons cars develop swirl marks and light scratches.
The problem usually comes from dragging grit across the paint. Road film, salt, mud and brake dust all sit on the surface. If that dirt gets trapped in a sponge or cloth, it acts like fine sandpaper.
Common beginner mistakes include:
Using one sponge for the whole vehicle
Washing from the bottom upwards
Skipping the pre-rinse
Using washing-up liquid instead of car shampoo
Letting the wash mitt touch the ground, then using it again
Drying with an old bath towel or chamois
A single bucket makes the problem worse. Every time the mitt goes back into the water, dirt returns to the wash solution. The next panel then gets washed with contaminated water.
A safer method uses a pre-rinse, a proper car shampoo and separate rinse water. Many detailers use the two-bucket method, with one bucket for shampoo and one for rinsing the mitt. Grit guards can also help keep larger dirt particles at the bottom of the bucket.
The order matters too. Start with cleaner upper panels, then work down to the dirtier lower areas. Wheels, arches and lower sills should not share the same mitt or towel as the paintwork.
Drying deserves the same care. Use a clean, soft microfibre drying towel and avoid pressure. If the car has been washed properly, the towel should glide across the surface rather than being dragged hard over the paint.
How to avoid it
Build a repeatable safe wash process:
Rinse loose dirt first.
Clean wheels and arches with dedicated tools.
Pre-wash where needed to soften road film.
Contact wash from top to bottom.
Rinse the mitt regularly.
Dry with clean microfibre towels.
A good wash does not just make the car look clean. It protects every later stage of the detail.
2. Skipping paint decontamination
Many beginners wash the car, dry it, then go straight to polish or wax. The paint may look clean at a glance, but that does not mean the surface is actually clean.
Embedded contamination often remains after a normal wash. You might feel it as roughness when you lightly run your fingertips over the paint, especially on lower panels, rear bumpers and tailgates.
Typical contaminants include:
Iron particles from brake dust and rail fallout
Tar spots
Tree sap
Industrial fallout
Overspray
Old wax or sealant residue
If you polish over contamination, the machine pad can pick up those particles and drag them across the paint. That can create extra marring instead of improving the finish. Waxing over contamination also reduces bonding, so protection may not last as long or look as clean.
Paint decontamination normally has two parts, chemical and mechanical.
A chemical decontamination step uses products such as iron remover or tar remover to dissolve specific contamination. These products need to be used correctly, with the right dwell time and plenty of rinsing. They should not be allowed to dry on the surface.
Mechanical decontamination uses a clay bar, clay mitt or clay towel. Clay can remove bonded grime a wash will not shift, but it can also mar paint if used carelessly. Lubrication is essential. So is light pressure.

How to avoid it
Do not guess whether paint needs decontamination. Check the surface after washing. If it feels rough or gritty, decontamination is needed before correction or protection.
A sensible process looks like this:
Wash and rinse the vehicle thoroughly.
Use iron remover where fallout is present.
Treat tar spots with a suitable tar remover.
Rinse well between chemical stages.
Clay only when needed, using plenty of lubrication.
Rewash or rinse before polishing.
More is not always better. Aggressive claying on soft paint can leave marks. The skill is knowing when to clay, when to use chemicals and when the surface is ready to move on.
3. Getting machine polishing wrong
Machine polishing can make a tired car look completely different. It can remove oxidation, reduce swirl marks and bring gloss back to paint. It is also one of the easiest detailing steps to get wrong.
A polishing machine is not dangerous when used properly, but it does require control. Beginners often focus on the tool rather than the full system. The machine, pad, compound, paint type, work area, pressure and speed all affect the result.
Common machine polishing mistakes include:
Choosing a pad that is too aggressive
Using too much compound
Working a section for too long
Applying heavy pressure
Running the machine too fast
Tilting the pad rather than keeping it flat
Ignoring panel edges and body lines
Failing to clean the pad during use
Burn-through is one of the biggest fears, especially on edges where paint can be thinner. Uneven correction is another common issue. One panel may look glossy, while another still shows haze or swirls because the same pad and compound behaved differently on a different paint type.
Heat is also a factor. Staying in one place too long can build heat quickly. That risk rises on repainted panels, plastic bumpers and sharper edges.
A beginner may also chase perfection too soon. Not every vehicle needs heavy correction. Some cars need a light enhancement polish, especially if the paint is thin, soft or already heavily corrected.
How to avoid it
Start with a test spot. A test spot is a small area where you try the least aggressive pad and polish combination that may achieve the result. If it works, there is no need to go harsher.
Good polishing habits include:
Inspecting paint under proper lighting before starting
Taping sensitive trim and edges where needed
Keeping the pad flat
Working small sections at a time
Using moderate, even pressure
Cleaning or changing pads regularly
Checking the surface often
Measuring paint depth when appropriate
Training makes a huge difference here because polishing is physical. You can read about arm speed and pressure, but feeling the machine move across real paint teaches far more. A trainer can spot bad habits early, before they become normal.
4. Having poor product knowledge
A product label rarely tells the whole story. Beginners often buy whatever looks popular, then apply it to every surface in the same way. That approach can lead to patchy results or damage.
Detailing products are designed for specific jobs. A wheel cleaner may be too strong for sensitive finishes. An interior cleaner might not suit leather. A trim dressing may stain paint if applied carelessly. A compound that works well on hard German paint may behave very differently on soft Japanese paint.
Product knowledge is not about owning shelves full of bottles. It is about understanding what each product does and why you are using it.
That includes knowing the difference between:
Shampoo, pre-wash and traffic film remover
Iron remover and tar remover
Compound, polish and glaze
Wax, sealant and ceramic coating
All-purpose cleaner and dedicated interior cleaner
Leather cleaner and leather conditioner
Acidic, alkaline and pH-neutral products
Dilution is another key point. Some products are ready to use. Others must be diluted for the surface and level of dirt. Using a strong all-purpose cleaner neat on a delicate surface can cause staining, fading or texture changes.
How to avoid it
Read product instructions, but do not stop there. Learn the reason behind each product category. When you understand what a cleaner, polish or protective product is designed to do, you make better choices on real vehicles.
Before using a new product:
Check the surface it is designed for.
Test it in a small hidden area if there is any doubt.
Use the correct dilution.
Do not let chemicals dry unless the instructions say so.
Keep separate towels and applicators for different jobs.
Avoid mixing products unless the manufacturer says it is safe.
This is where proper tuition beats random trial and error. Good trainers explain why a product works, not just when to spray it. That knowledge helps you adapt when a car does not respond the way you expected.
5. Underestimating the business side
Not everyone who learns detailing wants to run a business. For those who do, technical skill is only half the picture.
A flawless finish matters, but a detailing business also needs pricing, time control, customer communication and realistic service packages. Many new detailers struggle because they charge too little, take too long or offer services they cannot deliver consistently.
The biggest business mistakes are often simple:
Pricing by guesswork
Copying competitors without understanding costs
Taking on heavy correction jobs too early
Failing to explain what is and is not included
Underestimating product, towel and pad usage
Forgetting travel time, setup time or admin
Promising perfection on vehicles that need major work
A beginner may spend a full day on a car, use a large amount of product and still charge less than the job costs to complete properly. That can make detailing feel stressful very quickly.
Good business habits protect both the detailer and the customer. Clear packages help customers choose the right service. Proper inspection helps set fair expectations. Accurate pricing means the detailer can take the time needed to do the job safely.
How to avoid it
Treat the business side as a skill, not an afterthought. Track how long each task takes. Work out your real costs. Learn how to inspect a vehicle before quoting. Be honest about what a service can achieve.
A basic detailing business process might include:
Inspecting the vehicle in person where possible
Asking how the vehicle is used and stored
Explaining the difference between cleaning, enhancement and correction
Setting realistic expectations for defects
Giving clear prices for clear services
Allowing enough time for safe work
Photographing condition before and after
Confidence grows when the process is clear. Customers also trust a detailer who explains things properly rather than promising a miracle finish on every car.
Why training helps beginners avoid these mistakes
Detailing can be learned through practice, but untrained practice can build bad habits. If the wash process is wrong, every car washed repeats the same mistake. If polishing pressure is too heavy, every panel becomes a risk.
Hands-on training shortens that learning curve. It gives beginners direct feedback on technique, product use and decision-making. It also shows what good results look like under proper lighting, not just in shade or on a wet panel.
At Detailing Academy Scotland, training is based on the same methods used every day on real customer vehicles at ACC Valeting & Detailing. That matters because real cars are rarely perfect. They have soft paint, hard paint, old wax, tar, scratches, stained trim and awkward panels. Learning on real examples helps build judgement.
This is especially useful for anyone comparing beginner detailing tips online or looking to learn car detailing Scotland with proper supervision. Videos and guides can help, but they cannot correct your hand position, your machine angle or your pressure while you work.

Learn the right way from the start
The best beginner detailers are not the ones with the most products or the most expensive machines. They are the ones who learn safe, repeatable habits early.
Start with the basics. Wash safely. Decontaminate properly. Respect the polishing process. Learn what products actually do. If you plan to charge for your work, treat the business side with the same care as the finish.
Every one of these mistakes can be avoided with the right guidance and enough supervised practice. Getting trained from the start helps you build confidence, protect customer vehicles and produce better results without relying on guesswork.
Ready to build real detailing skills the right way? Get in touch with Detailing Academy Scotland to find out more about hands-on training courses.


Comments